
If you want your digital artwork to look the best it possibly can, you need to do post-processing on your renders. I use Daz Studio for rendering so that’s what I’ll mostly be discussing here. However, this process will work with the vast majority of digital renders, regardless of what you use to make them.
As for Daz, you may or may not have noticed, but the images it creates are always ever so slightly blurry. How blurry they are depends on your render settings, and there are ways to combat this but I’m yet to find a method that yields perfect results. With post-processing you don’t have to worry about this so much.
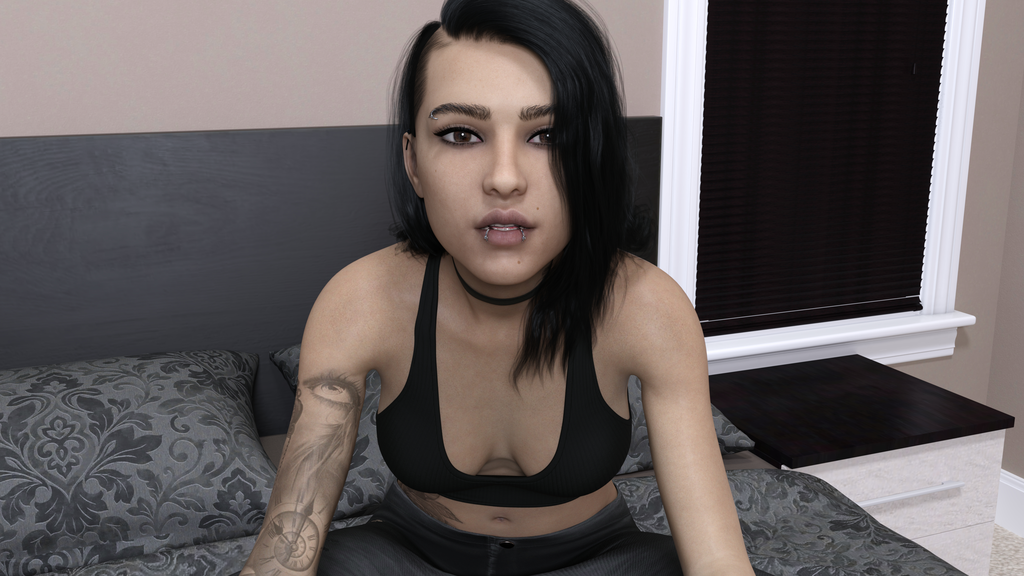
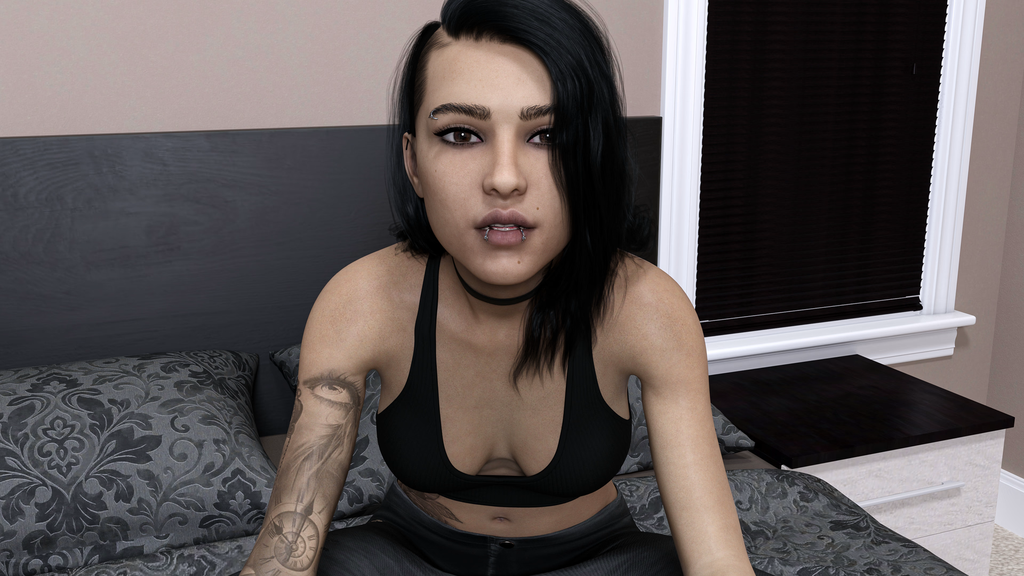
One of the main benefits of render post-processing is that it makes your artwork look more realistic, as you can see from the images below.
Preparing Your Render for Post-Processing
The first thing you need to do is make sure your images are actually ready for post-processing. The vast majority of the time you’ll be able to start the process immediately, but sometimes, especially when using Daz Studio, you’ll need to do some post-fixes on your images before you can do post-processing.
You’ve probably noticed skin poking through clothes in the AVNs you’ve played or the renders you’ve made. This is often not shown in the pre-render viewport so you only discover this has happened after the render is complete. And if you use something like Render Queue to make multiple renders at once, this can cause serious issues. Especially when you have 30 odd renders that all have skin poking through clothes.
There are three ways to deal with this.
Ignore it
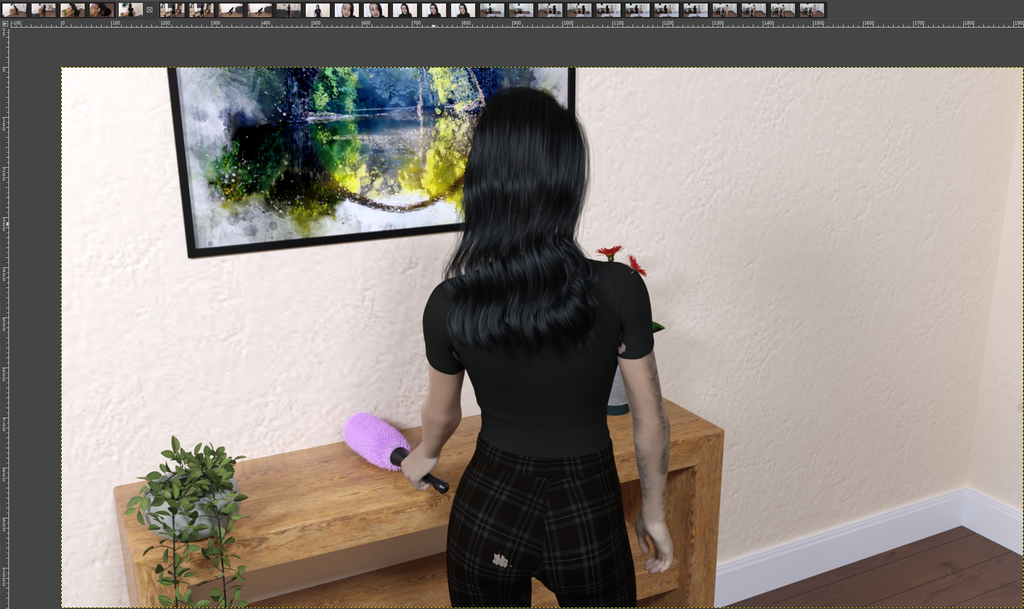
Plenty of devs do this and it’s fine, but when your players notice these issues it pulls them momentarily away from the story to think about the errors in the art. However, sometimes ignoring minor mistakes is valid if they’re unlikely to be noticed. For example, in the images above there is a tiny bit of skin poking through Sophie’s clothes but it’s barely noticeable. Can you spot it?
Rerender
Another option is to reload your files and do the render again after adjusting the settings and fixing what caused the issue. This works well in some cases, but if you have multiple images to fix it can be quite time consuming.
Use a virtual paintbrush
This sounds a lot more daunting than it is but it works on everything, not just clothes. I use this method to fix hair, objects, reflections, etc. All you need is Photoshop or GIMP (which is free and what I use to edit images).
The issues in the image above are easily fixed. All you have to do is select the colour picker tool, select a coloured pixel on the image close to the poke-through, then use the paint brush to paint over the skin. This is best done at 400 to 800 percent zoom for accuracy.
You’ll often have to use more than one colour to paint a single area due to shadows and lighting, but you can also use the smudge tool to blend the colours together if you’re not happy with the results.
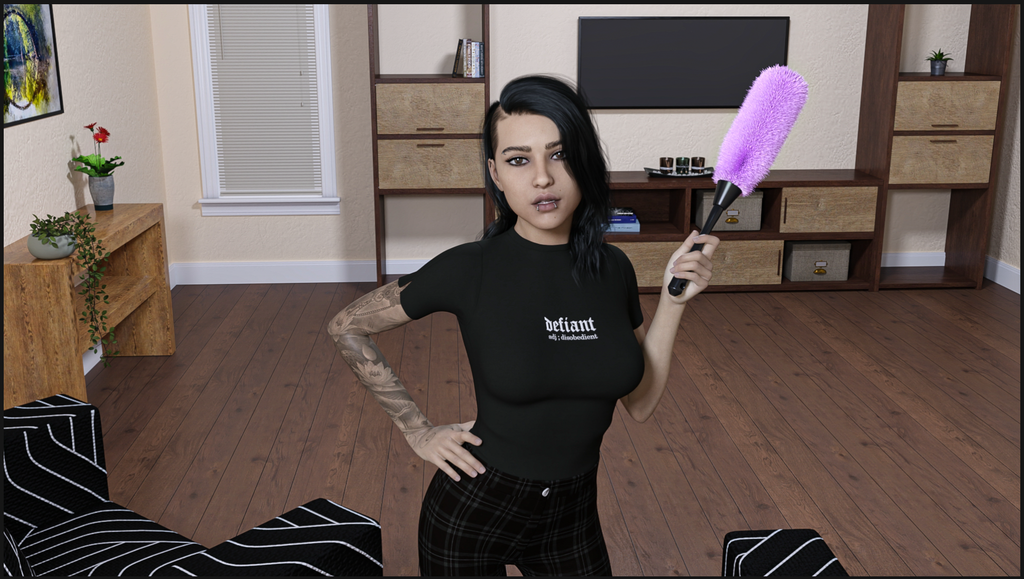
Things like single coloured t-shirts are easy fixes, but patterns or materials like satin can be more challenging. Sophie’s trousers are tartan, which means I had to paint the pattern on myself. This is still done with the colour picker and the paintbrush, it just requires a little more time as you recreate the pattern as best you can. But you’re not Leonardo da Vinci so don’t worry about getting everything perfect.
This method is exponentially quicker if you have a series of images where the character is in the same pose the entire time. Once you’ve fixed the poke-through on one render, you can copy and paste this fix to every render. I’m not sure exactly how it works in Photoshop, but in GIMP it’s incredibly easy.
- In the right-hand tab, right click the image and add alpha channel (this makes the background under the image transparent).
- Use the free select tool to draw around the area you want to copy and paste.
- Press the ctrl and i keys at the same time to invert the selection, then press the delete key. You should now only have the section of the image you want.
- Remove the selection by zooming out to 50% and drawing a triangle anywhere in the view screen that’s not on the image.
- Copy the image and paste it onto the next image.
- Select the move tool and click anywhere in the image to confirm the paste.
Now your next image should be fixed without having to rerender it or get your paintbrush back out. You can then copy and paste this selection to as many images you need to.

Render Post-Processing
I use Adobe Lightroom to do render post-processing. It’s a software used by photographers to edit their photographs and works amazingly with digital renders too. It’s $12.99 a month ($19.99 for Photoshop and Lightroom together) but I use it on hundreds of renders a month and the results are well worth the price in my opinion. But there are plenty of other applications you can do this with. Gimp even has some post-processing features. I just prefer to use Lightroom as that’s specifically what it’s designed to do so it has a lot more features.

Due to the slight blurriness of images that are made in Daz Studio, the most important thing to adjust is the sharpness of the image. It’s difficult to see the blur in the image above as it’s rendered in 4k and scaled down (which is another way to reduce blur). But tweaking the sharpness in post removes all of the blur and makes the image look a lot more crisp.
All other adjustments come down to personal preferences. What works best for me won’t necessarily work best for you due to our lighting and render settings being different. But I’ll give you the post-processing settings I use in Lightroom for most renders. This way you have an idea of what can be adjusted and you could try these settings out yourself if you wanted to.
- Contrast +15
- Highlights +5
- Shadows -5
- Whites -30
- Blacks -15
- Texture + 5
- Clarity +10
- Sharp +30
There are a lot more tweaks you could make in post-processing, but I find the settings above work best for my art style. For your art, you’ll want to play around with the settings to find out what works for you.
When done, you need to export the images to your chosen folder. Do not export your images to the same folder they are currently in. This will overwrite them and you’ll lose the originals. I have two dedicated folders for Lightroom. ‘To do’ and ‘Done’. This ensures that if anything goes wrong with the process or you’re not happy with the result, you can start again without having to rerender every image.
Tips and Tricks For Render Post-Processing
The goal of render post-processing is to make your images cleaner, better looking, and more realistic. You don’t need to make huge adjustments to do this. Little tweaks are often better than massive changes.
The adjustments you make all affect each other, which is partly why small changes work best. For example, upping the texture makes skin look more realistic. So why do I only tweak it by 5 when it can go up to 100? Because upping the sharpness makes the added texture grainy and for Daz renders, sharpness is the most important adjustment to make.
You can also adjust the temperature and tint of your lighting, so if you have an outdoor scene and the lighting doesn’t quite look right, you don’t have to rerender every image. You can simply adjust the lighting in post. This also works for nightclub scenes where you want to simulate coloured lighting or strobe light effects. Don’t spend ages messing around with your lighting set up in Daz, do it in post.
If you have noise in your renders (little grains where the lighting hasn’t settled properly), you can fix that in post by using dehaze or noise reduction.
However, render post-processing isn’t a fix all tool. For example, if you want to blur the background of images to make the character the focal point, you’re better off doing this in Daz. Adding lens blur to renders tends to leave an outline around the character. For how easy it is to add depth of field to your cameras in Daz, you’re much better off doing it before rendering, not after.
Try It For Yourself
Seriously, your art will look so much better once it’s been post-processed. If you aren’t doing it already, you should really start. I didn’t bother for a long time, but now that I’ve learned about post-processing it’s become a vital part of my development process.